
How to Organize Your Makeup
I finally set out to conquer the task of organizing makeup once and for all and am so pleased with the results. I spent a full weekend working on reorganizing the linen closet we have in our bathroom, as well as all of my drawers, under the sink, and vanity. I’ve always wanted to use the vanity space for makeup, but due to a pretty shallow drawer there, I wasn’t sure it was possible.
Luckily, I found the PERFECT products that fit in this drawer and work amazing for makeup. It felt meant to be! I realize many of you might not have a dedicated drawer to makeup, which is totally okay. I’ve linked up some products at the end of the post that give you different options based on the space you have for your makeup whether it be a drawer, countertop, actual vanity, etc.

What I really want to do in this blog post is not convince you of one magical product though, because honestly, it completely depends on your space. Instead, I want to teach you some simple tactics on how to go about conquering a project like this on your own. This is about organizing makeup but really, these steps are applicable for organizing any space in your home. Let’s get started!

STEPS TO ORGANIZE
-
Number one thing to do when organizing a space is to take everything out. Yes, everything. Remove every product, organizing bin, or whatever else you have there – it all needs to go in order for you to start with a blank slate. AKA you want a totally empty cabinet, drawer, closet, pantry, under the sink area, etc…
-
Inventory what you have. Toss things that you’re not using or that have expired. Makeup does expire and most of us never pay attention to that! This is a great opportunity to purge.
-
Group like items. Put your eye shadow palettes together, foundations, brushes, blush, lipsticks and glosses, etc. Goal here is to group items together in order to create “categories” and to better see how much of each category you have. Then you can start to piece together your space (drawer, cabinet, closet, etc) and find a home for everything.
-
Then and only then, pick out organizing products. The number one organizing mistake people make is to shop for or pick out products before you’ve organized the space. You can’t possibly know what you need until you know how it’s all going to fit back into the space. It seems counterintuitive at first, but wait until after you’ve categorized and put things back into place to shop. *Side note: don’t buy organizing product sets (i.e. a “kitchen organizing set” or “pantry organizing set” that comes with x amount of canisters or x amount of bins in various shapes and sizes). Always shop for individual products that will 1) fit your need and 2) fit your space. Take good measurements!!!
-
Put it all together! Now is the fun part. You’ve cleaned house, mapped out where everything is going to live, and have products to help implement this new organizing system you’ve created. It’s finally time to put products in place, create labels if necessary, and make it look pretty! 🙂
WHAT WORKED FOR ME
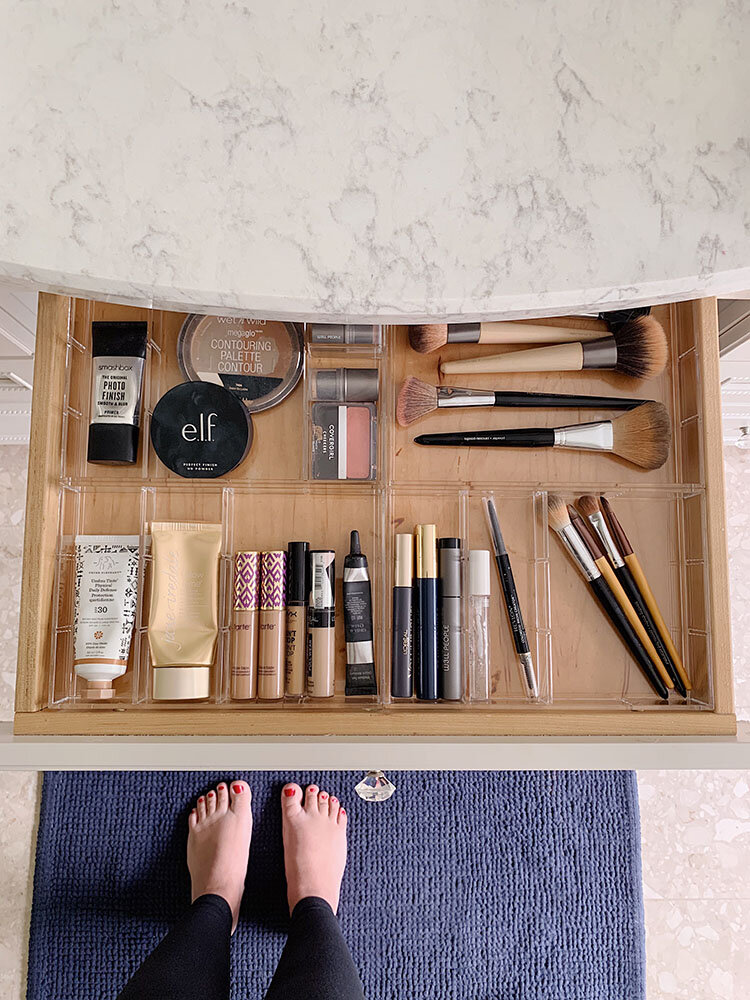
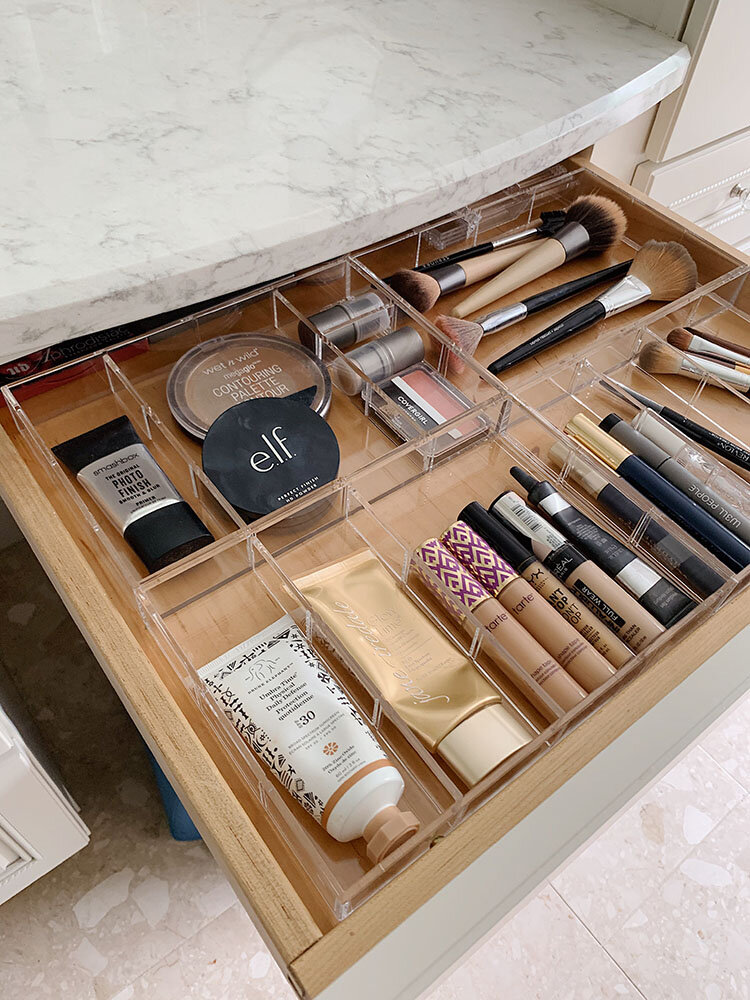
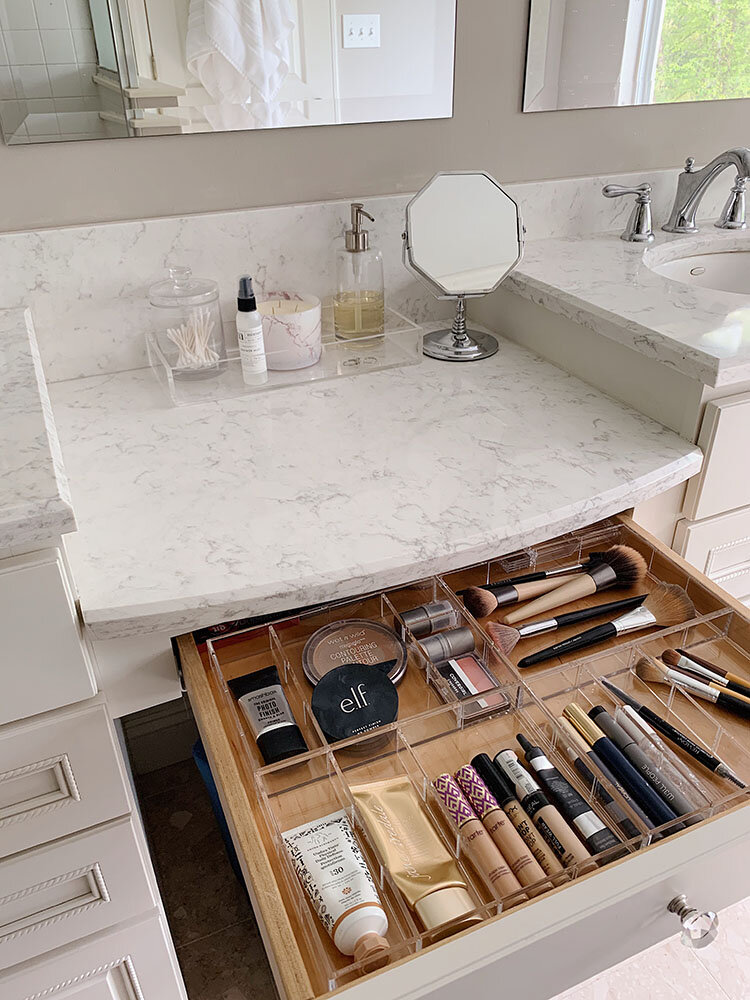
After doing the above steps and really settling in on keeping my makeup in the vanity area, I found these acrylic organizers that fit my very shallow drawer perfectly. The best part about them is that the little divider pieces are removable, so you can completely customize the sizes and spacing to fit products. This sort of thing is great for makeup since products are all different shapes and sizes. You’ll see in the pictures how I’ve completely customized them. (I have four total organizers in my drawer).
If you like a good time lapse video, head over to my Instagram to check out a video of me implementing all these products (and more) from our master bath reorganization project!
ORGANIZE ANY SPACE
You can truly organize any space in your home using the same process outlined above. The steps and process to good organization are the same. Tweak the small details to match what you’re doing. For example, you won’t need to check for expiration dates when organizing your closet…
My simple and no fail approach to organizing is as follows:
- Empty. Take everything out. Use this as a good opportunity to clean or wipe down surfaces, too.
- Inventory. I like to make three piles: toss, keep, donate. Again, this isn’t applicable for every space but you get the gist.
- Categorize. Find groups or similar categories for the items you plan to keep and set them together. You will be able to better see what you have in each category this way and how much space each category of items will take up.
- Products. Shop for or pick out organizing products to house your items and corral things together. Bins, baskets, containers, etc. Make sure to take very good measurements and choose things that will fit your space and your needs well.
- Put together. Place things back into your space using the categories and products chosen. The last touch I love to add are labels. They’re not necessary but they sure are a nice touch, especially if other people are ever in your home or putting things away. Systems are easier to keep up with when everyone knows where things go.
SHOP MAKEUP ORGANIZATION

MORE ORGANIZING IDEAS
File Folding Clothes and How It Will Change Your Life


2 Comments