
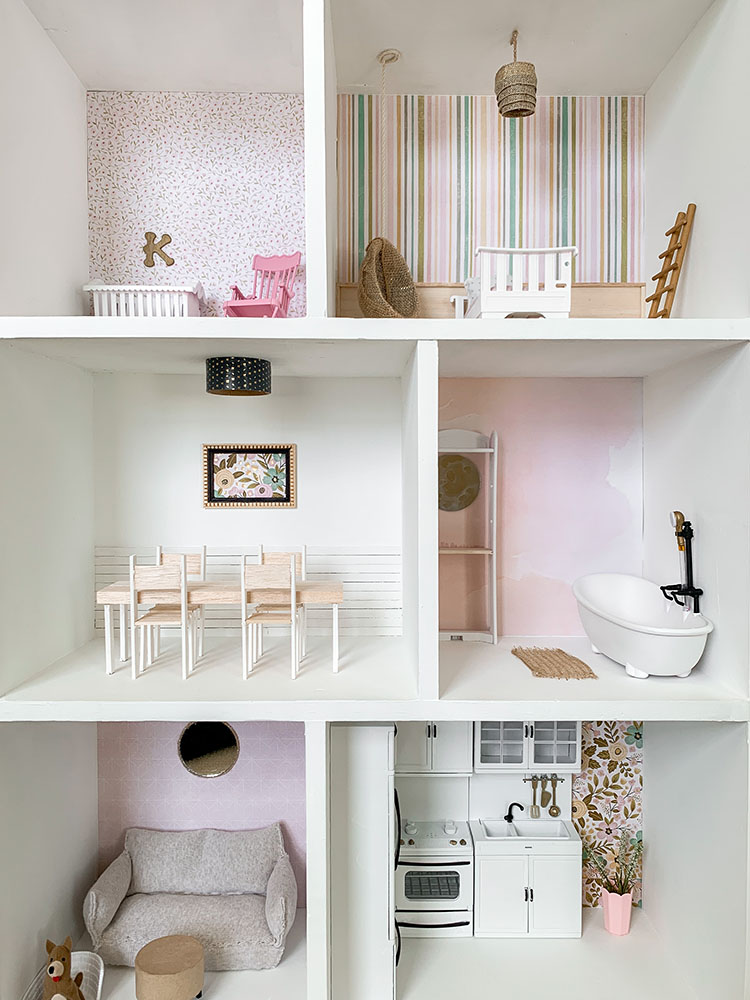
DIY Dollhouse Makeover Project
For my daughter’s second birthday I was hoping to do a DIY dollhouse makeover for her. I scoured thrift stores, swap sites, and everywhere in between for weeks. I finally found this incredible dollhouse bookshelf on Facebook marketplace for $15. A steal!
I had been searching for this exact thing for close to two weeks and one morning this one popped up and I about fell over. It ended up being a bit bigger than I originally planned for but now I’m so glad I went big. Kennedy will be able to grow into this dollhouse for years to come, which I love.
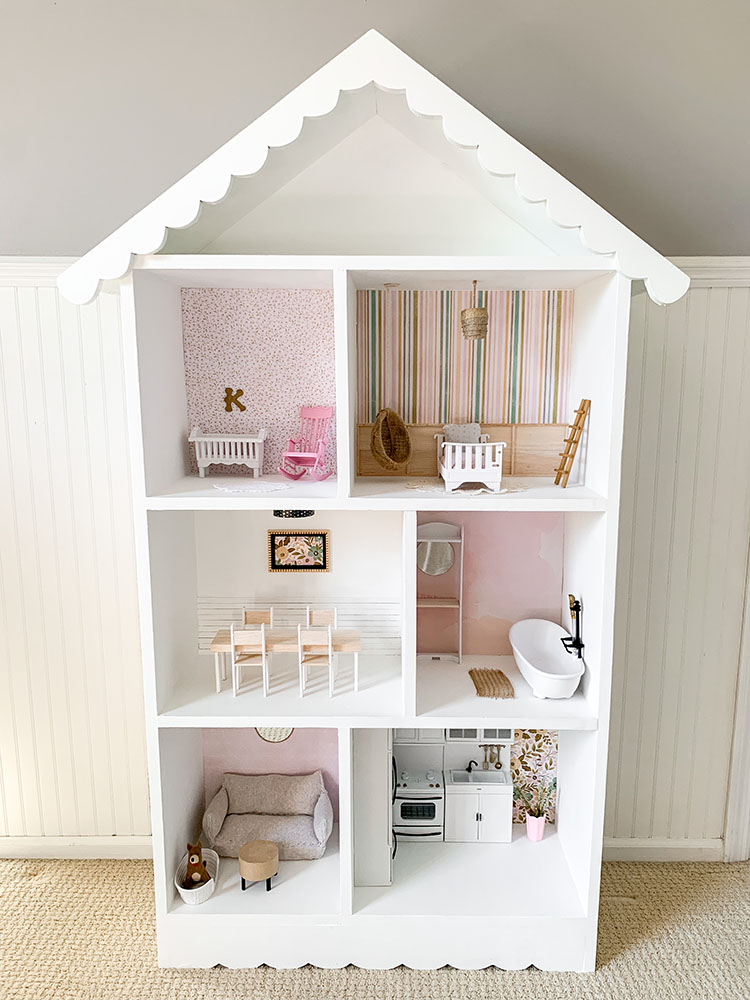
Since it was intended to be a bookshelf, there wasn’t a back on it. I knew that I wanted there to be “walls” that I could wallpaper, so the first step to my DIY dollhouse makeover was getting a wood backing. Luckily Michael and my father-in-law made that happen in no time with a piece of plywood. After that, the entire thing got a fresh coat of white paint.
I found so many cute dollhouses on Pinterest that inspired me in my design choices. Ultimately, I decided to make each “room” something specific and special.
SUPPLIES
- Scrapbook paper
- Double sided tape
- Barbie furniture (a mix of old and new)
- White paint
- Spray paint (white and black)
- Balsa wood (used for some furniture and panelled walls)
- Fabric scraps, doilies, ribbon
- Small household items (washi tape, gift box, plastic bottle cap for light fixture, etc)
- Hot glue gun
NURSERY
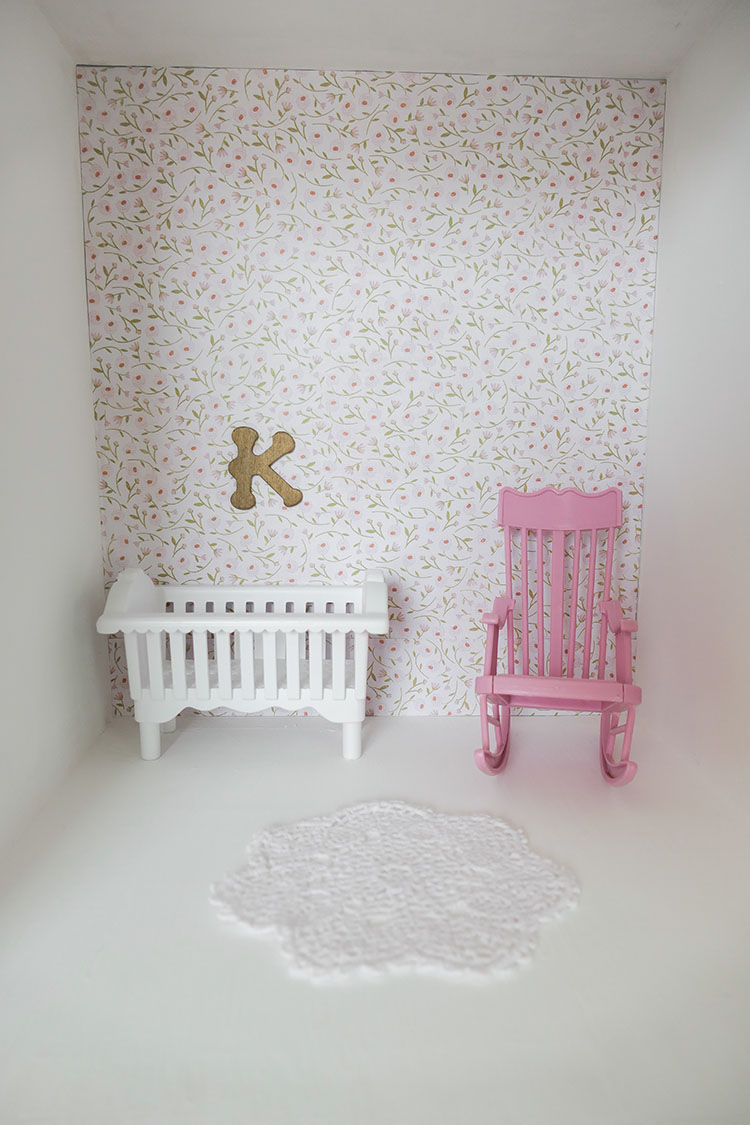
I think this little nursery is so darling. The wallpaper is scrapbook paper, and as with all of the “wallpapered” walls, permanent double sided tape was used to adhere. This was so much easier and far less messy than glue. I read the recommendation of double sided tape on another blog and I’m super happy that I went that route.
The crib is a repurposed piece of Barbie furniture from my childhood that we spray painted white. The chair was another FB marketplace find (I got a giant tub full of Barbie accessories that I picked through). I decided to keep the chair pink for a pop of color. The rug is a miniature doily found at Joann Fabric hot glued to the floor.
BEDROOM
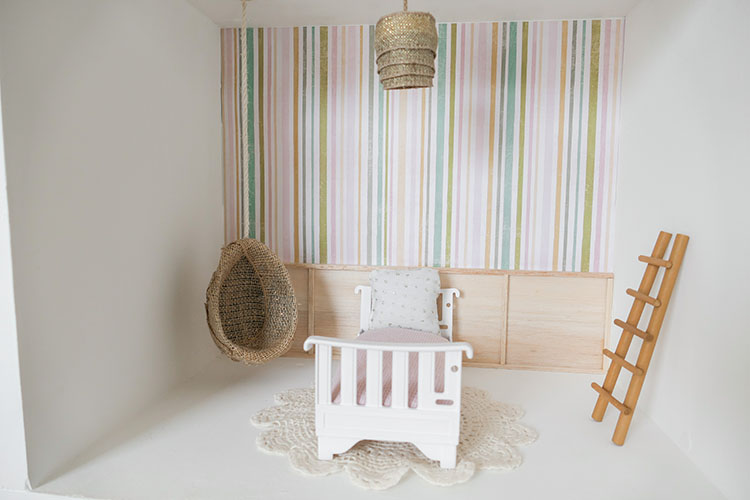
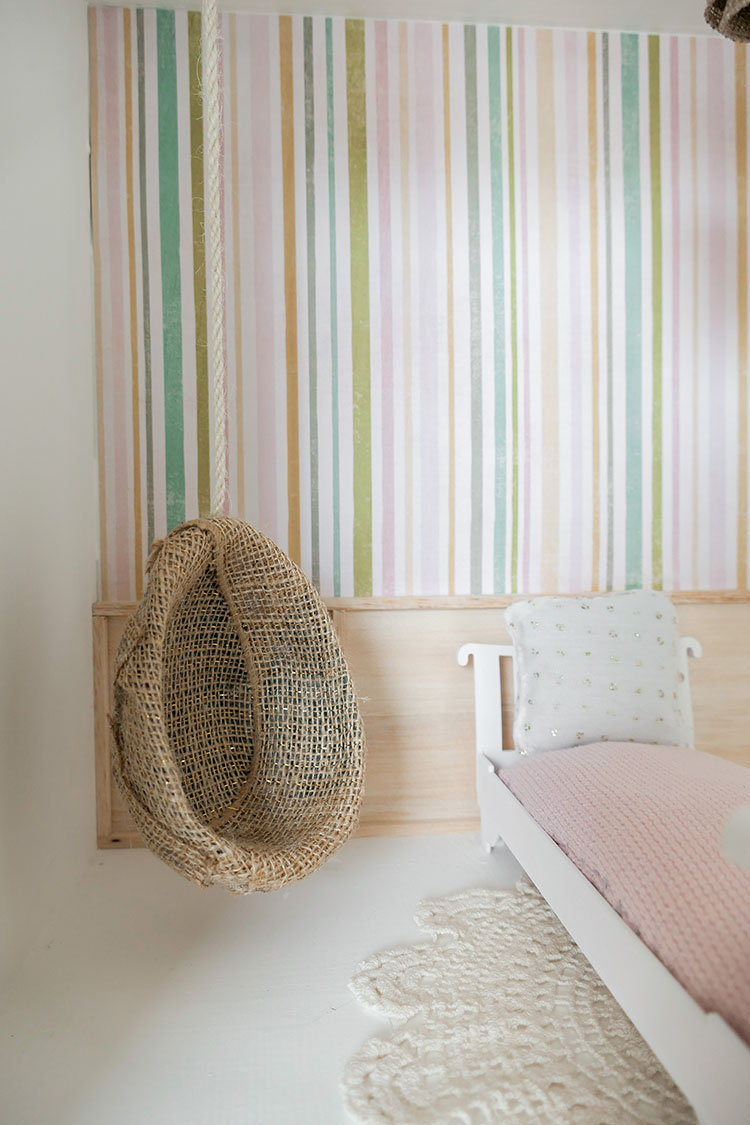
This room has so many fun details. I love the striped wallpaper and I did the board and batten wall with balsa wood. Balsa is really soft and easy to cut. I used a paper cutter, knife, and scissors to cut wood in different places. I found all of the balsa wood used for this DIY at Hobby Lobby.
The light fixture is an old bottle top wrapped in burlap ribbon and then hung from a thick twine. The hanging “egg chair” is one of my favorite DIYs of the whole dollhouse. I found a plastic egg shaped piece at Hobby Lobby, cut it in half at a diagonal and then covered it with burlap ribbon. It’s hung from the ceiling with thick twine rope attached with a hot glue gun.
The bed is another repurposed Barbie piece from my childhood that we spray painted white. I made a new mattress filling with an old shirt of Kennedy’s as my fabric and batting to stuff it. I also recovered an existing Barbie pillow with new fabric for the bed. The little ladder is from the fairy garden section of Hobby Lobby.
I think of all the rooms, this fun bedroom is my favorite from the entire DIY dollhouse makeover project.
DINING ROOM
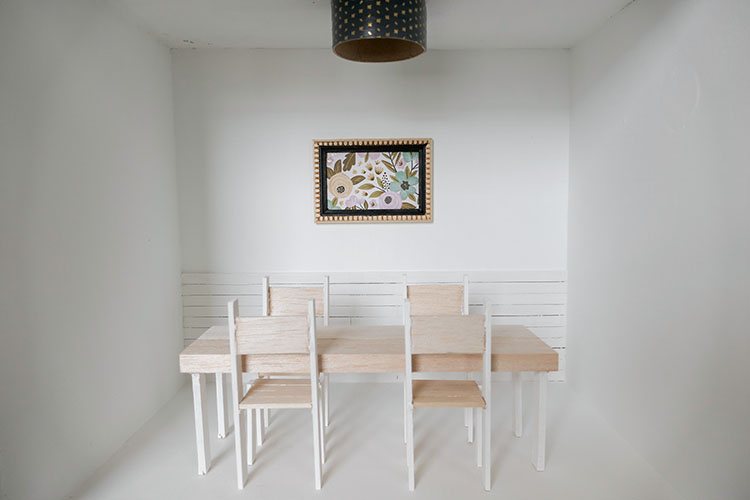
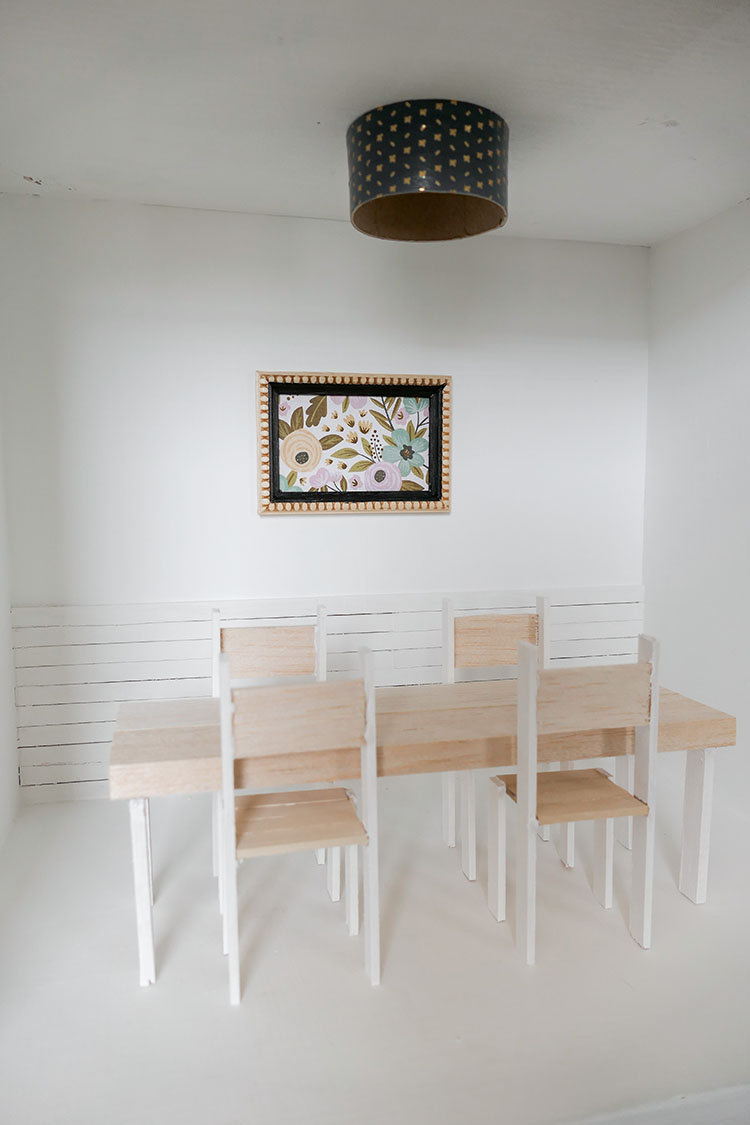
The dining room is simple and clean. I started with the shiplap wall here, again using balsa wood planks, and then ended up painting them white. The table and chairs are also DIY and built by yours truly using balsa wood. I painted the legs of the table and all chairs white, leaving the rest its natural color. I sort of modeled the table and chair colors off of our own kitchen table.
The light fixture is the lid to a small round cardboard gift box that I wrapped in washi tape. I still felt like the room needed a pop of color, so I found a miniature frame at Joann Fabric to “frame” another piece of craft paper from elsewhere in the house. I also added a black matte to the frame by using a sharpie marker to color the inside of the wooden frame.
BATHROOM
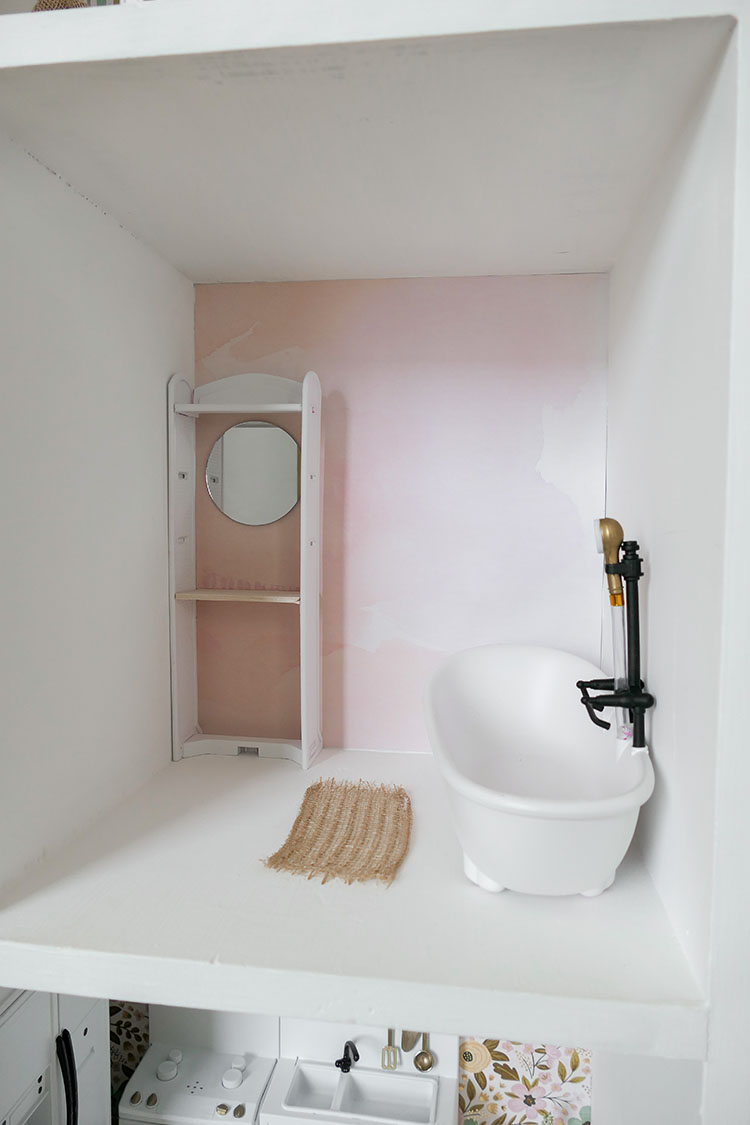
I love the marble wallpaper in this room and again, used double sided tape to adhere it to the wall. The vanity area is a piece of old Barbie furniture spray painted white with a round craft mirror on the wall.
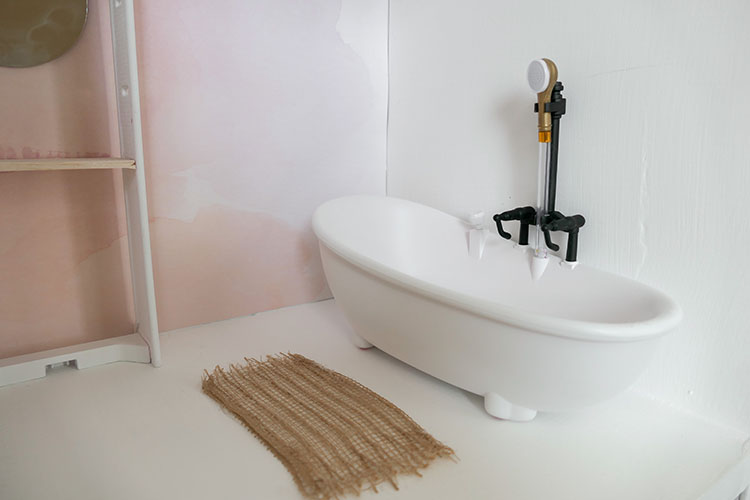
The bathtub was an Amazon purchase because I didn’t have anything like that on hand. The tub was HOT PINK, so we sprayed it white and sprayed the faucet part black for an accent. The bath rug is just a small piece of burlap glued to the floor.
LIVING ROOM
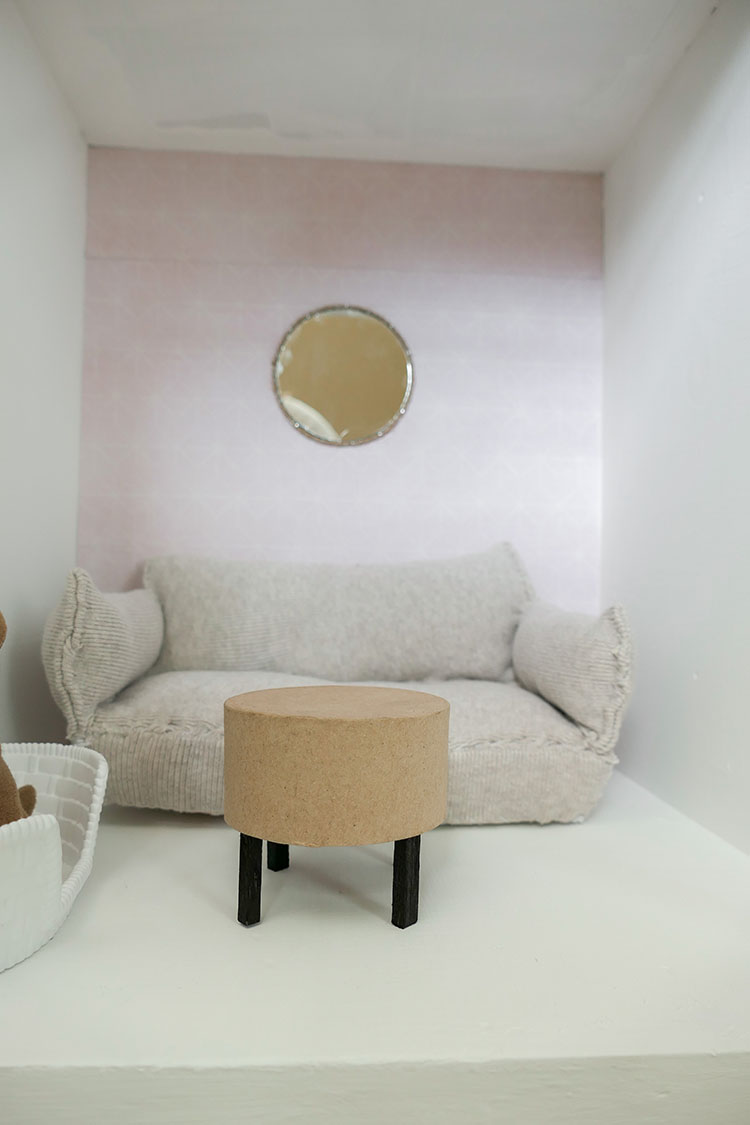
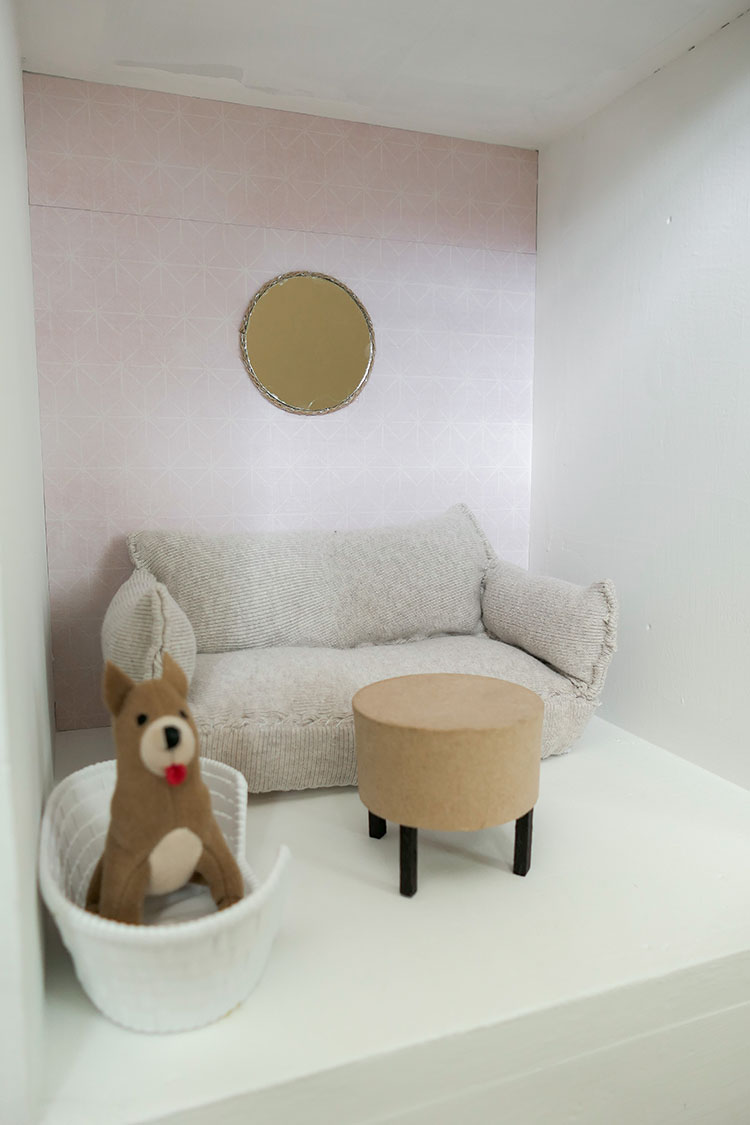
Another easy scrapbook paper wallpaper job to start off the living room. Perhaps the biggest DIY project for a single piece in the dollhouse makeover was this couch. It was a piece of Barbie furniture from my childhood and was originally a purple and yellow floral print. Not terrible but was a little stained and overall, not the aesthetic I was going for.
I took an old pair of Kennedy’s leggings that had a textured, twill feel to them, and decided to recover the couch in that material. I sewed everything by hand and it definitely took a good bit of time, but I love the neutral look that I ended up with.
For the coffee table, I used the bottom piece to the gift box lid used for the dining room light fixture and added legs. The legs are balsa wood and I colored them black using a sharpie marker. Very simple! Put a mirror on the wall and added a little doggie bed for our animal loving girl.
KITCHEN
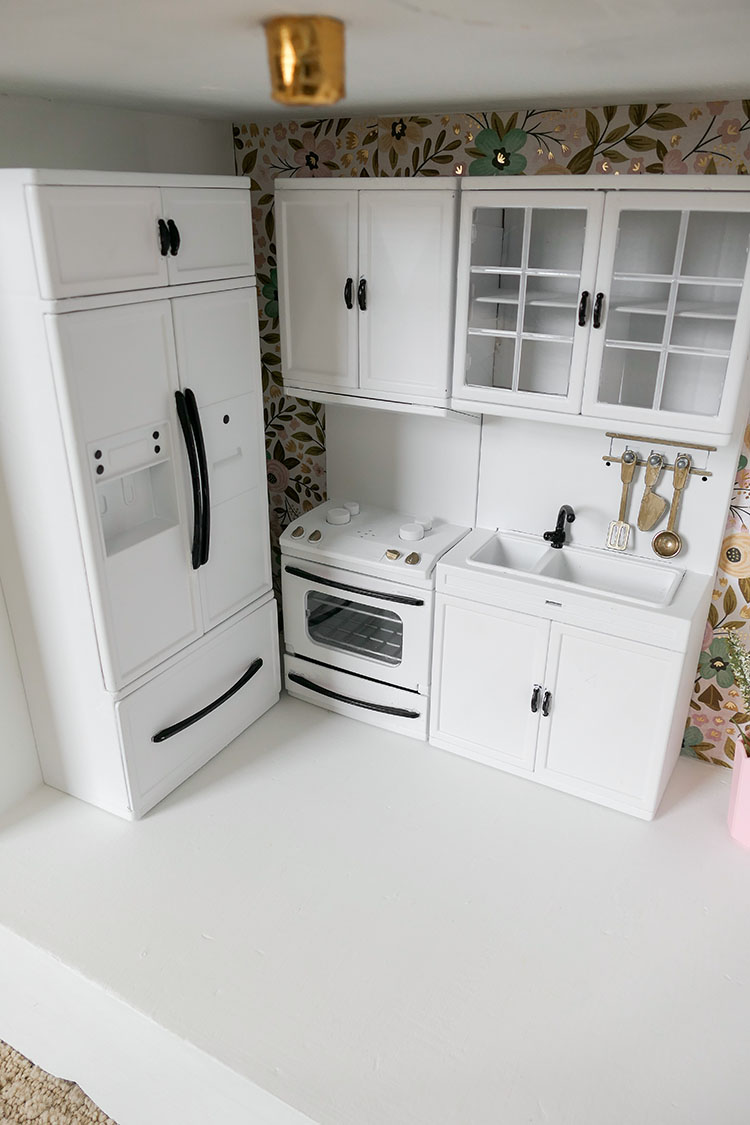
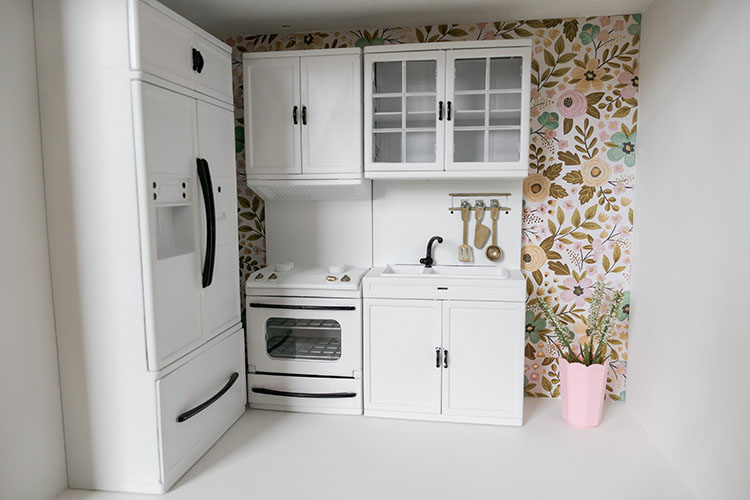
The final room of the house is the kitchen. I bought this set off Amazon due to the lack in kitchen items I could find on my own. Again, it was hot pink and needed a fresh coat of white paint. Thanks to Michael for being my spray paint guy and helping with these tiny details. After the whole kitchen set was sprayed white, I used a sharpie to color the handles and accents black.
I used a fun floral print for the wallpaper in this room since everything else was so neutral. It’s the same paper framed in the dining room. I also added a little pot in the corner with some repurposed faux floral stems I had on hand. The light fixture in this room is a plastic cap from a spray bottle covered in gold washi tape and glued to the ceiling.
For a video “tour” of the dollhouse head to my Instagram stories. Along with sharing here on the blog and a more detailed live tour on Instagram, feel free to pin these images to your own DIY, craft, or dollhouse inspiration boards.
MORE DIY PROJECTS
Plant Beautiful Summer Pots and Planters
Create a Greeting Card and Stationery Center
This is UNREAL. Nice job, mama!
You are so sweet. Thank you!! I hope she loves it for many years to come.